Narrowing Things Down

I’ll post more about my suspended layout, later, but I want to mention some other things I’ve been doing of late.

Primarily, I’ve been working with HOn3 narrow gauge steam locomotives.  Bill is a cliet from the Detroit, Michigan, area, and he has had me busy upgrading his Blackstone steam locomotives with KeepAlive.  Blackstone is a division of SoundTraxx, and it specializes in American narrow gauge model railroading.  They are also known for their quality of live, recorded sound.  All Blackstone steam locomotives are equipped with DCC Tsunami sound and DC/DCC compatibility, but they are not equipped with KeepAlive.  Bill has had me upgrading his locomotives with Tsunami 2 and SoundTraxx’s trademarked CurrentKeeper.  The CurrentKeeper stores electrical energy that suppliments power to the decoder when the locomotive and tender cross dead spots, dirty spots, or “imperfect” trackwork.  Depending on the size of the locomotive, the sophistication of its motor, and whatever else may be going on with the locomotive, the CurrentKeeper can maintain power for eight to twenty-five seconds.  It’s pretty great.  I once timed it with the locomotive simply idling.  There were no head- or back lamps lit, no sounds sounding, no motor moving; it was pure idle and die.  I timed 25.66 seconds after I removed it from the rails and before it finally died.  It’s pretty great!

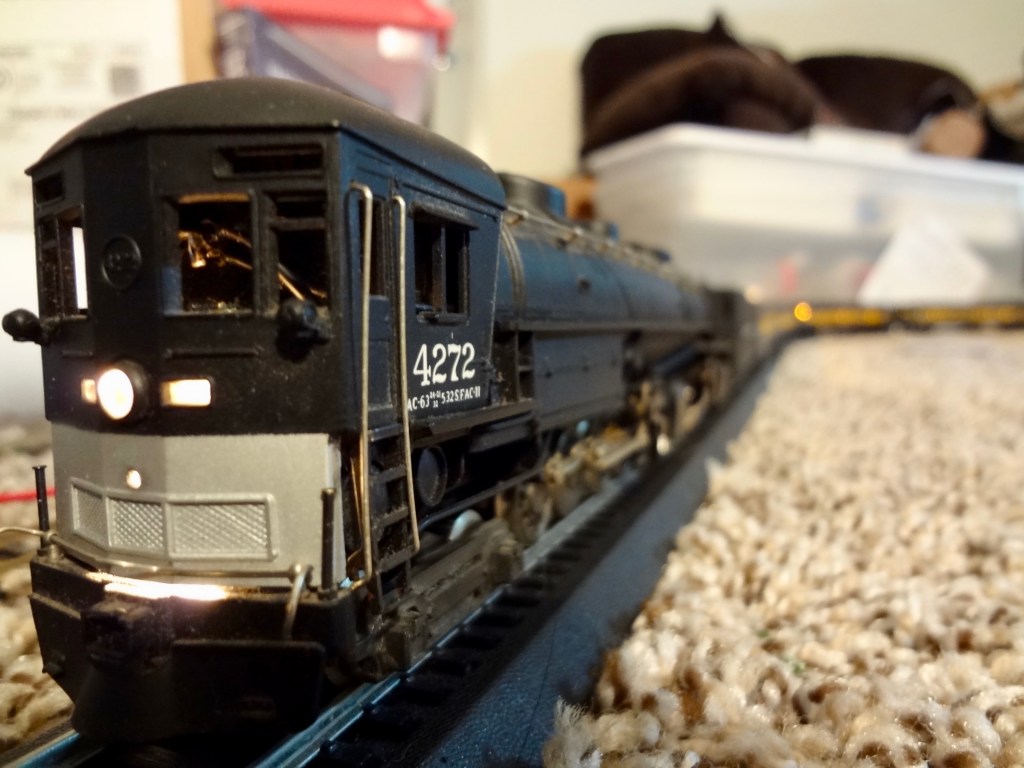
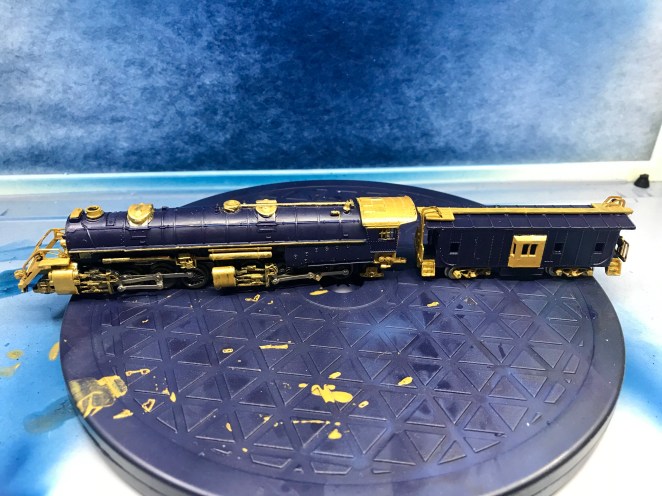
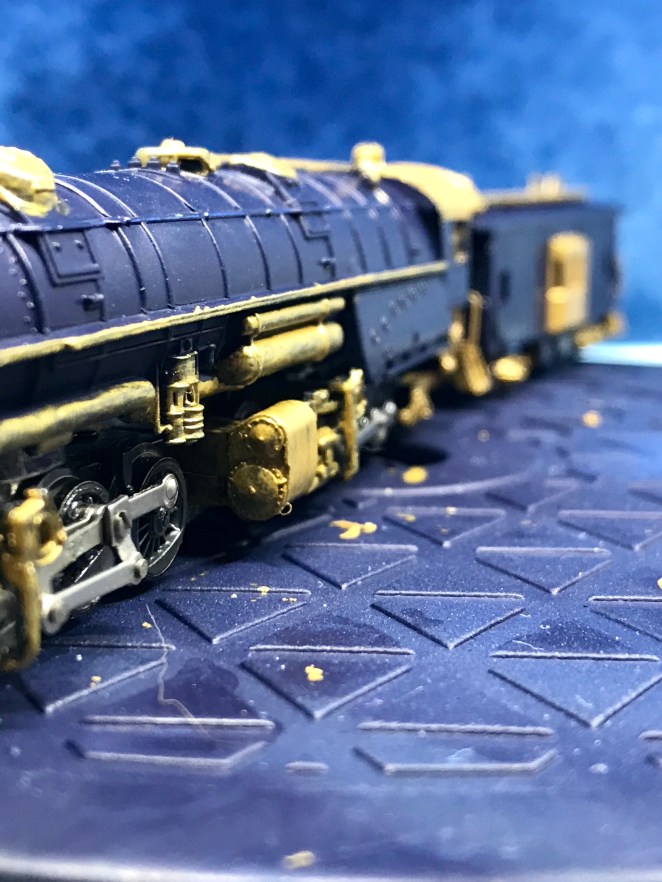
Below is a Blackstone C-19 steamer.  It had no original number so I called it “Lil’ Blue”.img_6582img_6581img_6580img_6567

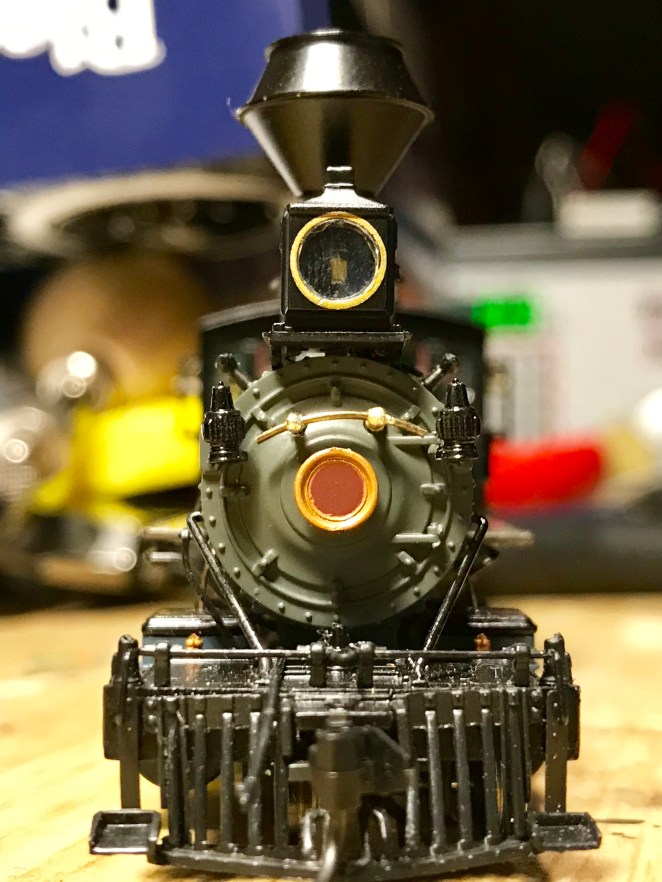
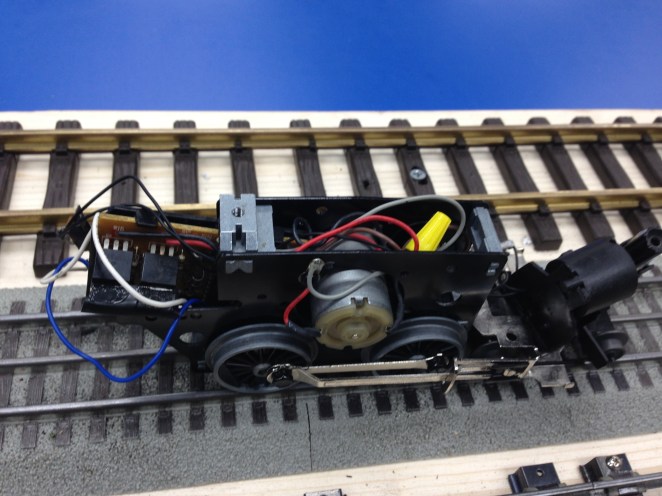
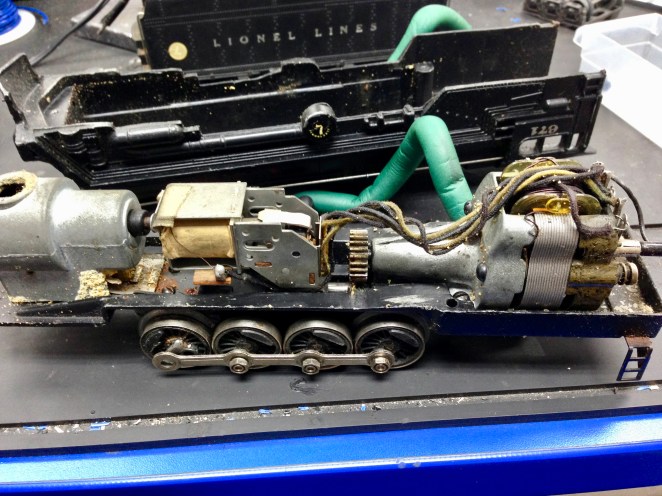
Rather than keep all the wires in one housing block, I separate the rail-pickups.  This is more compactable and less confusing in the longrun.img_6568img_6569

I use Dupont crimp-style wire connectors to avoid soldering and possibly burning right through the tiny wire.  I also paint the connector housing with white-out and label the wires individually so I know what is where.img_6570

C-19’s are pretty small, even for narrow gauge, so I am limited to how I can fit everything into one space.img_6573img_6566

The original wires are all black, so I requested a wiring diagram from SoundTraxx.img_6572

This stuff is AMAZING!!  It’s a  welding gel that hardens and cures when exposed to UV light.  It cures and hardens in about five seconds, so it’s great for temporary placeholding (coupler assembly) and permenant placeholding (loose wires).img_6574

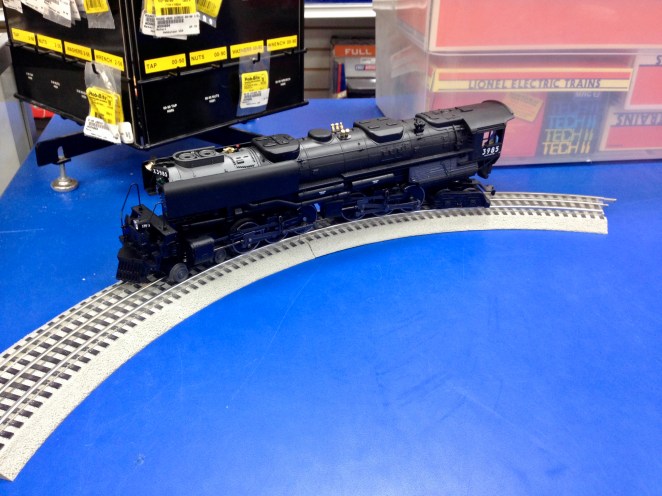
Between HOn3 upgrades, I installed DCC in an HO Rivarrossi 2-6-6-6 Allegheny articulated steam locomotive.  One of my fellow model train club (Crawford County Model Railroaders) members asked me to install this for him.  It’s one of his abolute favorite locomotives, and he wanted to be sure it would be done correctly.  I installed a Train Control Systems Wow101-KA-Steam decoder.  TCS is known for their superior slow and fine motor control and their “Goof-Proof” warranty.  I’ve always been very pleased with TCS’s products and customer service.  The finished installation sounds fantastic, and their audio-assist programming feature in their larger, higher-end decoders is a beautufily designed consumer-friendly tool.  They also offer multiple designs of KeepAlive.

Fun fact about the Allegheny:  it was more powerful than the Big Boy by 1,210 HP!!!


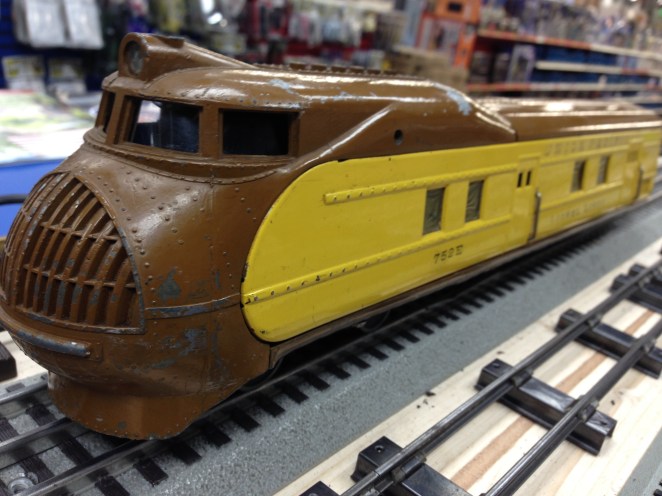
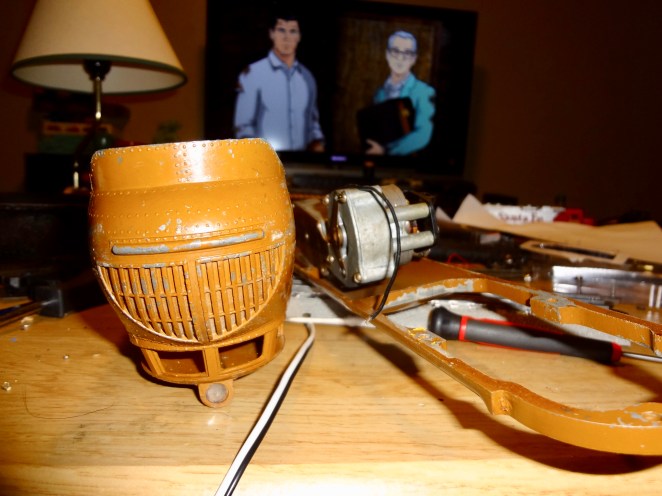
Another thing I’ve been doing is Frankensteining a custome N scale locomotive.  I started with an old Con-Cor 2-8-8-2 Y6B.  I took the shell off and insulated the motor, removed the original little headlamp, and unsoldered the motor-to-track power leads.  The Y6B started as DC, but I’m converting it to DCC.  I plan to use a Train Control Systems Wow101-KA-Steam sound decoder.  It’s designed as an HO scale decoder, but it just fits inside the auxilary tender I’m going to add to the locomotive.  Most steam locomotives use only one tender, but they can use one or two extras for longer trips, or trips that will require much more than the usual amount of fuel.  In this case, the decoder I’m using includes TCS’s KeepAlive.  I will be using two speakers—one in each tender–and have several lights in the locomotive tenders.  With all those wires and speakers, the original tender isn’t large enough, so I’m adding a Bachmann tender from a 4-8-4 Northern steam locomotive.  The additional tender is larger than the original, so the initial decoder, one speaker, and two 3-millimiter LED’s will go in it.  The KeepAlive, wires for the head lamp, and another LED will go in the original tender.

img_6545img_6547img_6548

I’m not using a caboose as a tender.  I was going to tack it on behind the second tender and wire it to draw power from both rails, but I decided this would be gawdy enough without it.  I will probably use it with The Lilliputian.img_6550

This new locomotive will be called “The Livingston”.  It will be repaitned in Baltimore & Ohio Railroad royal blue and antique gold with some silver trim, and it will be primarily a passenger train.  I’m also repainting and repurposing two old Con-Cor heavyweight passenger sets, a small three-car Rivarrossi passenger set, and an extra observation car to match.  Normally, the Y6B wouldn’t be able to haul all those at once without a helper engine, but I’m adding GO2 glue to all sixteen drivers to bolster her hauling power.  GO2 glue is perfect for adding traction to driver wheels because it doesn’t run during application, it dries crystal clear, it’s shock resistant, and it’s temperature hardy.  You won’t see it after it’s been applied and has set, and what little dirt it might pick up and show from the rails just makes everything look more protoptycial.  The only drawback is that it nearly completely degrades the elcctrical pick-up abilities of driver wheels, so I must draw power through another medium.  That is another function of the second tender.  The first tender will draw only from the right rail, and the second will draw only from the left.


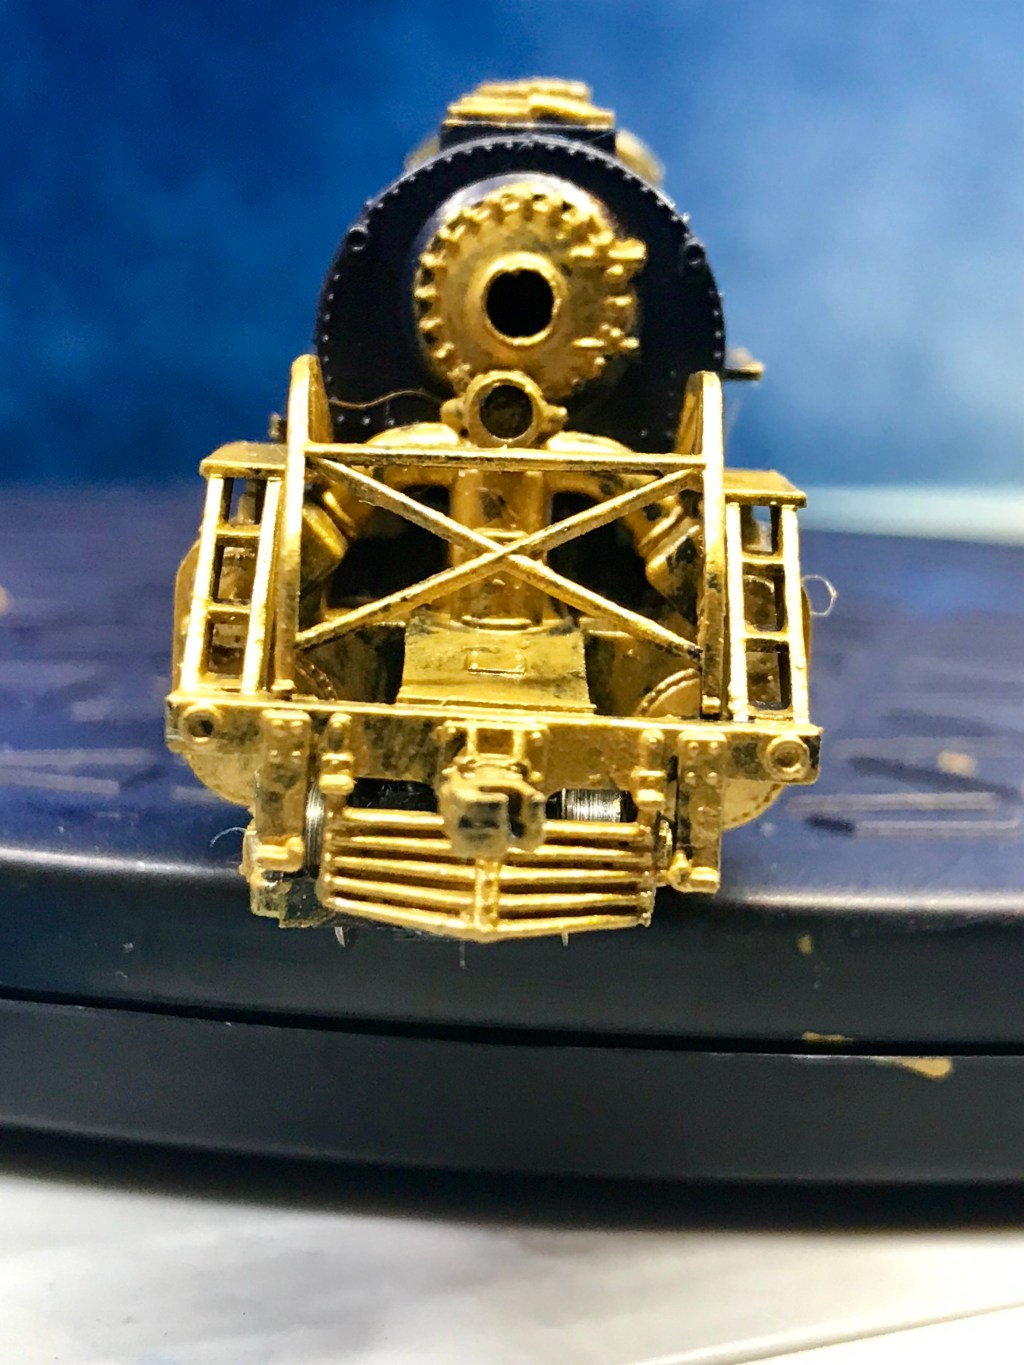
I have also started creating a sister locomotive called “The Lilliputian”.  She will be much smaller than her big sister; she is an Atlas 0-4-0 steam switcher.  The Lilliputian won’t have lights because the engine is just so small.  It is so small, that I must wire a passenger car to permenantly follow the tender.  Adding the GO2 stops the pick-up of the engine wheels, altogether, and the tender draws only from one rail.  It can’t be insulated to do both.  That is one of the functions of the passenger car; the car will also house the decoder, KeepAlive, and mini cube speaker.  I am not sure whether I will use TCS or SoundTraxx for the decoder, but I am sure I will TCS’s KA4-C KeepAlive.  SoundTraxx’s CurrentKeeper is dimensionally too long.

This is roughly how The Lilliputian will look when finished.img_1294

I had to replace the original tender pick-up flanges to better suite the re-orienting of the trucks to avoid contacting metal parts of the chassis.img_1290

I created a new drawbar out of plain plastic, and I painted it matte black.  The wire that leads from the rear truck to the decoder winds half-way around the drawbar and up through the step platform.img_1291

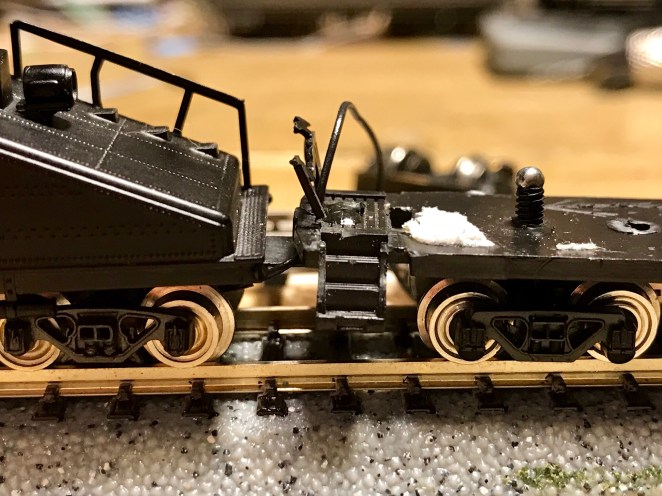
The wire will then lead through the door of the passenger car as inconspicuously as possible.img_1292


The Livingston is clearly more powerful and likes to show off, but The Lilliputian doing the same thing looks more impressive!

With all the HOn3 upgrading I’ve been doing, I’ve not had enough free time at once to work on my suspended Z scale layout.  Oh, well.  In due time…

“Big Things Have Small Beginnings”

As the line from Prometheus says, what started as a little plastic train set around a cake has become four sets occupying the better part of my apartment floor, and it keeps growing.

I believe I mentioned this in a previous post.  I am absolutely fascinated with Z scale.  It’s so much fun to look at all the detail that goes into this miniscule scale of such mammoth behemoths!  My modular layout is very nearly complete in its basic form.  All I really have left to do is adhere rare earth magnets around the edges of the foam boards.  The magnets will keep the boards from shifting when the layout is displayed, and it will keep everything together when it is folded up and in transit.

Pay no mind to my messy apartment.


I experimented with different ways of setting the ballast beneath the rails.  I tried spray-on adhesive, but the acid ate away at the foam.  I mixed ballast, Elmer’s glue, and vodka to make a sort of paste, and it sort of worked.  The traditional ballast spreading device was okay, but I think it would have worked better on uniformly level surfaces.  Oh, well.  One thing I did really like was using a dropper to soak the curing ballast with more alcohol to help the glue run more along the outline of the ties and trails.  I never intended this layout to be very detailed.  I can’t have too much to it, or it could make a mess if it were all knocked to the floor or broken.

It’s the Little Things. The VERY little things.

Of all the different sizes of model trains, I find the most fascinating to be Z scale.  It’s so small and minuscule, but it is also so mighty!  The little engines are so tiny, but they are deceptively fast and strong.  My first Z set was a Micro Trains Line Desktop Railroad Set with a New York Central F7 diesel.  I also bought a Western Pacific four-car wreck recovery pack.  I really enjoy my little train set.

I’ve noticed something about how the whole consist pulls.  It may be due to the angle of couplers, or merely the size of everything, but it seems that there needs to be enough weight to everything for the couplers to catch one another.  If they are not taught, they release and come undone.  The lack of weight is good for long loads and going in reverse with a lessened chance of derailment, but not so great for staying together.

From little to not so little, I am excited to get into two-rail O scale.  I have only one such item–my Rivarossi 0-8-0 Indiana Harbor Belt steamer.  I’ve heard from several that the two-rail O scale models look more like models than the those of the three-rail variety.  Based on the details I have observed in my engine, I am inclined to agree.  Even so, the track seems to be quite expensive.  It will take much saving to build my little railroad, but the time and money will be well worth the effort.


Let’s move on to bigger things.  A customer brought in two O scale locomotives.  He wanted one to get some regular maintenance as well as have a smoke unit installed.  I wasn’t quite sure if I could make one fit, but I did!  I just happened to already have two smoke units in my spare parts dish.  I was sure I would have to do a lot of form fitting, cutting, molding, possibly melting, and major rewiring to make it work.

As it turns out, all I needed to do was shim the whole frame of the engine.  The smoke unit just fit.  There is absolutely no room for any movement, jostling, spare wires–it could almost be air-tight.  But it fits.  It works.  And I didn’t have to do ANY drilling or filing.  The customer is sure to be happy.

Oh, and the engine, itself, works good as new, too.  Not that that was the whole point of bringing the thing in, or anything…………..


As for the other engine, it seemed to be much more of a challenge.  Fitting a new unit in the body was easy.  It even aligned with the smoke stack.  However, getting the mechanism to puff the smoke in equal and consistent puffs was more than adverse.  The new smoke unit fit, but it wasn’t shaped the same way.  The empty air reservoire that actually pushes the smoke up and out was offset in the old one and directly center in the new.  The lever that operates the reservoire column was too long and not correctly shaped to properly work with the new unit.  I tried flexing the lever and form filing the reservoire, but everything caught and stuck.

I was fidgeting with the old smoke unit, trying to figure it all out, when I dropped the thing to the floor, and the burner element fell out of the loose end cap.  Then, it hit me.  All I had to do was swap out the old wax melting element for the oil boiling one.  After much scraping and digging, the new element fit perfectly.  I soldered everything up, slapped the cap on, fit the rest of the engine back to the frame, and crossed my fingers.


’twas most awesome.

That same engine had a funky reversing unit.  I cracked it open, and everything was pretty dirty.  The funny thing about a reversing unit is the number of parts it takes to make an engine simply move.  The inner drum is lined with metal belts that are shaped to alternately contact metal flanges.  Each flange is soldered to a different wire that either provides electrical flow or redirects it somewhere else.  If a single one is bent out of shape or contacting the wrong belt, nothing works.  It all just sparks or sits dead.  The flanges took some flexing and sanding, but I got it all back into shape.  Pulling the drum out is easy.  Putting it back in is a pain.  The two walls that hold the drum in place have to be close enough to contact it, two flange boards have to fit into slots of the unit walls, the flanges have to be spaced wide enough to allow the drum to fit back into place, and the clip that rotates the drum has to be out of the way.  Much in the fashion of re-assembling steam engine drive rods, everything has to fit in just the right way at just the right time.


I really wish I had had the sense to take photos of the things I’ve been mentioning in this particular post.  Oh, well.  There will be plenty more photogenic opportunities.

In the meantime, here are some photos of other things.IMG_2453IMG_2434IMG_2433IMG_2430fullsizeoutput_2728fullsizeoutput_2729fullsizeoutput_272afullsizeoutput_272bIMG_2484fullsizeoutput_26c6

“Make it Work!” ….or don’t.

Sometimes, the only thing to do when stumped is to find a way to just make it work.  If you can’t make it work, make something that does.  So, I did.

Model railroading has been around for a long time.  It is a very enduring hobby.  In the earlier days, there were many variances and inaccuracies in scale and detail.  One of the most easily overlooked but crucial details of model railroading is couplers.

There are a variety of different styles of couplers used in model railroading.  There are hooks and loops, trucks with coupler arms, coupler boxes attached to body frames, interchangeable couplers, permanently installed couplers, metal and plastic ones, all metal, all plastic–so many variations!

A customer came seeking a particular style of coupler for his son’s rolling stock.  His son was swapping out his truck-mounted and pin-fastened horn couplers for knuckle couplers because he wanted a more prototypical aesthetic.  There is a specific coupler that will fit the little pins, but they are out of production.  Therefore, I decided to fashion some adapter sleeves that will secure modern knuckle couplers around the holding pins.

I used 3/32″ and 1/8″ hollow copper tubing to make a two-part sleeve.  The inner sleeve fits around the fastening pin, and the outer sleeve fits around that sleeve and within the coupler loop.DSC06246.JPG

I would have used only one size of tubing, but I did not find any of appropriate fit.  Now that I think about it, I am glad I am using two sizes.  There is still a very small tolerance between the inner sleeve’s outer diameter and the outer sleeve’s inner diameter, and that leaves a little wiggle room for fine fitting to slight differences in pin diameters.

This photo shows the adapter sleeves in place with a No. 5 Kadee coupler and copper mounting spring.fullsizeoutput_26dc

The adapter sleeves are simple.  However, they do take a little time to make and install.  If they are too thick or thin, they may not hold the coupler in place well and could fail.  Trial and error are great teachers.

This is my cat, Korra.  Oddly enough, she is afraid of my train sets.  Even the little N scale one makes her leery….  One day, I am going to get her to ride on my G scale set.  It will be epic!!!img_2089img_1953img_1910

It’s the Little Things

“I’m just kidding!”  I was so relieved, I almost cried.  She just came back to buy the Hogwarts set.  I smiled, and we both had a good laugh before I carried her new set up to the register.

That was a pretty good night.


Today, I enjoyed a coupler swap and re-build for a regular patron.  He is building a Denver and Colorado railway themed layout, and he found a particular boxcar to fit the theme.  However, it was missing a coupler on one end, and it had an older style coupler than what the rest of his set had.  It took a little time, but I fit some new coupler boxes with modern horn couplers onto the wood frame of the car.  He also brought in a boxcar which he had bought from the store that he believed needed new couplers, or something.  Every time the boxcar hit a curve, it or its adjoining cars derailed.  I fit new couplers into the wheel trucks, and all was well, again.

He was very excited about his new boxcar.  He repeatedly said, “I want it!”  He was very hopeful that I could make everything fit for him, and I really enjoyed and shared in his excitement about his hobby.  The little things like that really make waking up worth it.

Another big little thing is watching kids play with my train set.  I brought my N scale set from home and set it up by my work bench.  I know most people won’t be convinced to buy trains just from playing with a set, but they still enjoy it.

That’s what it’s all about.  The only reason anyone needs for a hobby is the fact that they enjoy it.  I have always been fascinated by the sounds of trains rolling down the rails, watching steam locomotives’ wheel cranks move and work together, and how smoothly turnouts blend into and out of a line of track.  There’s just something about the smooth perfection of it all that has a certain artistic beauty.

Some people prefer the large scales, and others prefer the small ones.  I enjoy all of them.  The large ones are really visually impressive, and the small ones are so cute and fun to work  on!  The small ones are also deceptively fast.  Little Z scale engines can shoot off like rockets if you give them plenty of electrical power!

Another fine artistic beauty is the design of the two Hornby European steam locomotives I worked on, today.  Some of the cranks were bent out of shape, and I had to do some scratch soldering, but they both ran beautifully when I finished them.  I find it interesting that some of them draw power from the engine and feed it to the motorized tender.  The green 4-6-2 was like that.  The black 2-6-0 drew power from both the engine and tender, and it was considerably faster than the green one.

Now that I think about it, it was the European style with which I originally fell in love as a kid.  That’s how all the trains on Shining Time Station were made.  It’s funny to think that a European-inspired show featured the Union Pacific 4-8-4 844 American style passenger steam locomotive on its emblem and opening theme credits.  I may have to invest in some European steam locomotives.  They really are beautiful works of human industry and creation.

The green one is finished and just chilling to the side while I test run the black one.  I love watching the big driving wheels turn and move all the little attached parts.

fullsizeoutput_26bf


See how the piston crank is bent into a Z shape?  It’s not supposed to be like that…

fullsizeoutput_26bd

Riding the Rails and Living the Life

I’m not where I imagined I would be, but I can’t think of a better dream come true.

“Shining Time Station” was my first foray into the world of trains, and it will stay buried deep in my heart for my lifetime.  I still have all of my old die-cast, probably lead-based paint, Thomas & Friends trains in a box at home, somewhere.  I will never give them up.

My first electrified set was an HO scale Life-Like Santa Fe freight set with an extra little green switcher.  I loved that train set.  I played with it so much, and my parents often had to yell at me to get to bed.  I would have stayed up all night playing with it.

My train set took over our pool and ping-pong tables for a long time.  I don’t know how many extra dollars I added to the electricity bill, but I gladly pay the extra bucks, now.  I’ve always been an HO railroader, but this new train repair job necessitates that I begin amassing sets in all the other scales.  I have a nice new G set, I pieced together an N set, and I have two O scale sets with some extra engines and rolling stock.  I am very proud of my train sets, and I am not ashamed to admit that they are my vise.  Some people become alcoholics, substance addicts, or whatever.  “My name is Michael, and I am a train hoarder.”

fullsizeoutput_268a

I wasn’t really expecting to get into model train repair, but I am very glad I sent my boss an inquiring e-mail regarding their train department.  I had never heard of HobbyTown USA.  I just Googled “train shops near me,” and it appeared in a list of several places.  I happened to inquire about a train department job right as their established train repair technician was about to move away.

I really lucked out!  I was very fortunate to train–**slaps knee**–with Jim, the only Lionel Certified train repairman north of San Antonio in the state of Texas.  He taught me everything he could in two weeks.  A patron brought in an HO scale 2-8-8-2 steam locomotive with a broken crank rod support assembly.  It had been dropped or gripped too hard, and it had come loose from its pop-riveted frame.  I tried to think how best to secure metal to metal without the use of a flame torch.  The plastic of the wheels would melt if exposed to my micro torch’s flame, so I decided to drill out the rivets, thread the bore, insert some screws, and sealed the threads with super glue and solder.

I “passed with flying colors!”  That singular engine was my big test, and Jim felt very comfortable leaving his patrons and their trains in my hands!

Thus far, the engine has not come across my bench, again, so I can only believe that my repair work has held.  To date, I have had only one repeat repair, and that was today.  Somehow, the manufacturer forgot to insert a drive shaft in the body of a diesel locomotive.  The engine’s back set of driving wheels wouldn’t turn.  The front ones slipped and spun out while the back wheels were dragged behind.  That is no way to travel!  I took an oversized drive shaft from a parts locomotive of similar model, cut it down to appropriate size, and inserted it into the customer’s engine.  It held for a little while, but the modified shaft couldn’t hold up to the demands of the conductor.  Such modified parts only go so far.  We swapped that engine for an identical new one, and all was well, again!

The internal wiring of some modern O scale engines is impressive.

img_2154

Below is an articulated Union Pacific Challenger. It’s body is so long, it almost can’t handle the curve.
fullsizeoutput_269a

This is the inside of a 6-8-6 turbine steam locomotive from the first half of the Twentieth Century.  It had lots of corrosion and crud built up inside it, but it still ran right out of the box in which it had been stored for almost half a century.

fullsizeoutput_269e

One of my best repairs was an O scale Lionel Polar Express engine.  A lady brought it in on my day off, so I couldn’t receive and spot-diagnose it for her.  My first thoughts when I pulled it out of its box were how many cotton fibers had built up in the crank rod assembly.  It took a while to cut and clear those away, but I still couldn’t get the engine to do anything after a full cleaning and lubrication.  I replaced the broken primary crank rod, flexed other crooked rods, and checked all the solder joints.  Still nothing.  I had the lady bring in the tender and LionChief remote, and that was all that it really took.  I got it to work, tested it in every what I could think of, and saved the lady and her family hundreds of dollars.  They had purchased the set less than a month prior, and this was a five hundred dollar set.  Such high-end sets should never experience such problems, but shit happens.  I fixed her train, and she was happy and relieved!

As I was working on her engine and we were talking, we got on the subject of Harry Potter.  She and her family are all huge Harry Potter nerds, and they almost bought the Hogwarts Express set versus the Polar Express.  They initially wanted something Christmasy.  The more she and I talked about its different features and design, the more she wanted it.  After she left with her newly repaired engine, she promptly walked back into the store and marched back to my bench.  I was already holding my breath, and I almost shat my pants when she said, “I dropped it.”


…………to be continued.

fullsizeoutput_26b8